Your First Riding Lesson, Part 1
Posted by Saddle Up on Apr 16th 2015

(photo taken from horsechannel.com)
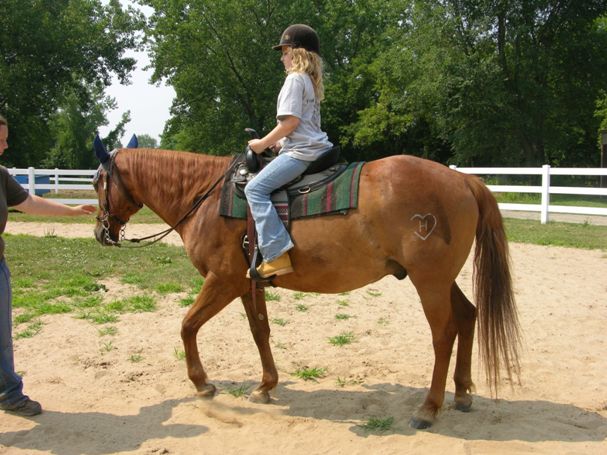
Spring is here and summer is just around the corner! This is the perfect time to start riding lessons! Whether you've already found a stable to ride at or are looking at taking some trial lessons at different stables, here's some tips to prepare you or your child for what a typical horse lesson looks like!
Part 1 includes the groundwork that happens before and after you ride. Next week, in Part 2, we will give you tips for the riding portion of your lesson!
1. Proper attire goes a long way to making your riding experience comfortable and successful. For both English and Western disciplines, hardy jeans are a good choice and a shirt that is not to tight or too loose, but fits comfortably and allows for movement. Remember, you'll be outside working with a horse and participating in a physical activity, so make sure you're dressed for it! Footwear is incredibly important. Boots with a sturdy heel are a must. The heel stop's your foot from sliding all the way through the stirrup to the ankle and is a big safety measure. If you have long hair you may want to consider pulling it back away from your face. Helmets are recommended, but are not always required. Check with your teacher and use your own discretion when deciding whether or not to ride with a helmet.

(photo taken from krumkillstables.com)
2. For your first lesson, the teacher will probably have your horse caught for you. If not, you will go out with your teacher to learn how to catch a horse. Your teacher will give you instructions on how to catch a horse, but here's a quick run down of how that works:
*make sure your halter is untwisted and ready to go so the horse doesn't get bored and walk away while you're figuring the halter out!
*don't let the lead rope drag on the ground. Keep it in your hand and when you get to the horse, put it over his neck.
*be aware of the other horses around you!

(photo taken from youtube.com)
3. Grooming is next! This is to get the horse clean (a stick, twig or bur poking the horse under the saddle is never good), to check for injuries, and to enjoy a moment of bonding before you ride. The bare minimum of grooming includes: currying, brushing, and hoof picking. The curry comb dislodges hair and dirt and then you brush it off with a dandy brush. Cleaning the horse's hooves are vital to keep the hooves free from rocks that could cause lameness and to prevent disease.
*Be sure to move calmly and confidently around the horse, making sure to let the horse know when you're walking behind him, by leaving a hand on him all the way around.

(photo taken from pixgood.com)
4. After a thorough groom, you're ready to tack up. Depending on your discipline, English or Western, the tacking up procedure will be slightly different, but the basics remain the same.
*put the saddle pad/blanket on first, making sure there is space between the withers and the pad.
*put the saddle on gently. Don't let it slam down on the horse's back. Position it correctly and make sure the space between the withers and the pad is still there (We like to give the pad a little pull up into the gullet of the saddle. This helps from the pad pulling down to heavy on the withers) .
"do the cinch/girth up, making sure not to do it too tight at first, for the comfort of the horse. Continue to tighten it gradually before you get on and check it after you warm up as the horse will blow out air in time, causing the cinch/girth to get looser.

(photo taken from lovehorsebackriding.com)
Your teacher will probably bridle for your first lessons, but here's some things to watch for and memorize for when it's your turn.
*be very gentle when bridling. You are dealing with the horse's head after all.
*make sure the horse's mouth is open before putting the bit in, otherwise there is a chance you'll hit the horse's teeth.
*bend the ears to slip the bridle behind them. Don't crunch or squish them... bend them forward. This is most comfortable for the horse.

(photo taken from videojug.com)
5. After you've ridden you'll bring the horse back to the hitching post or cross ties and untack him. Take the bridle off first and put the halter back on and then you can take the saddle off. Most horses love an after ride groom, especially if they've worked hard, so if you have time give them a good rub down.
Once you're done with that, you and your teacher will take the horse back to his pasture/paddock/stall where you'll undo the halter, slip it off, making sure you are holding the majority of the lead rope.
6. Be sure to wash the bit before you leave! This is for hygienic and care of the bit reasons, as it will last longer, look better, and be clean for the next time the horse has it in its mouth.
Join us next week for Part 2 of Your First Riding Lesson!

(photo taken from aspengrovebc.com)
"If the horse does not enjoy his work, his rider will have no joy." - H.H. Isenbart
~ Saddle Up
